
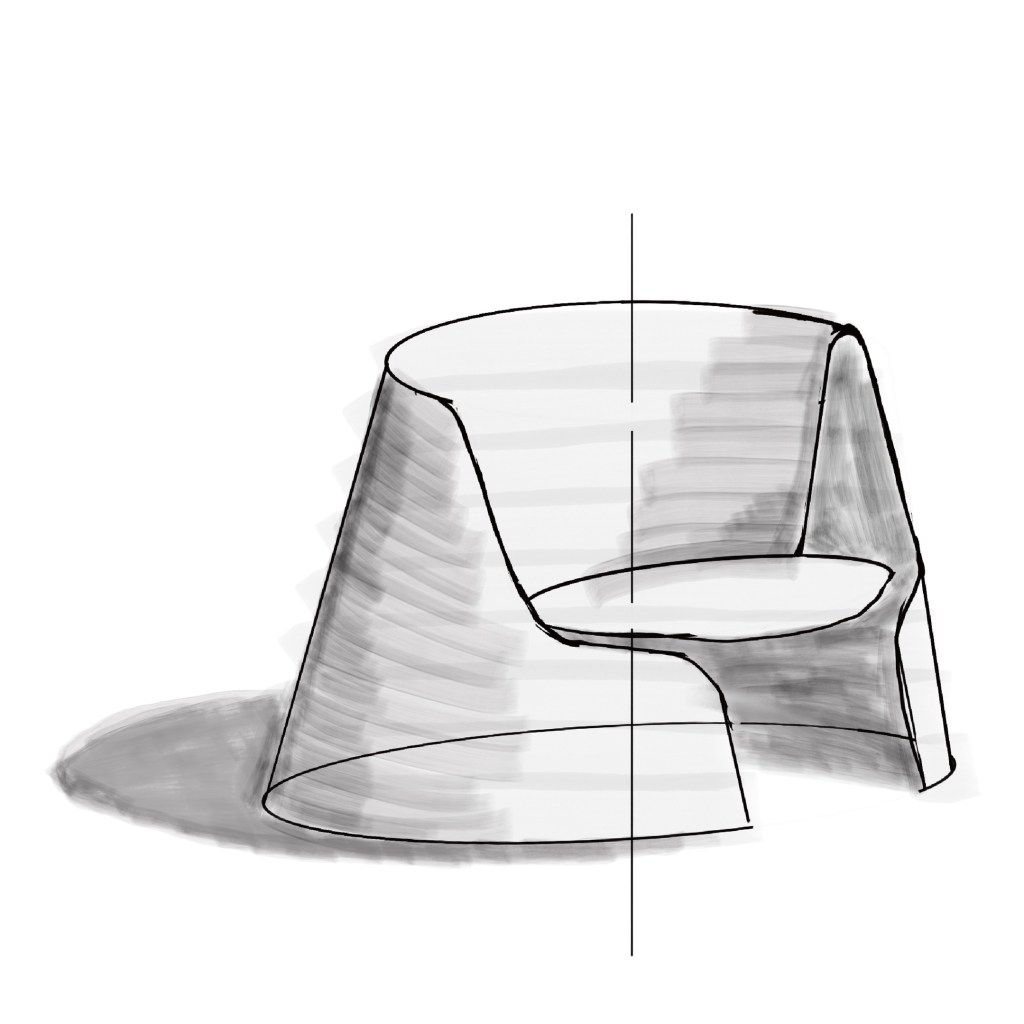
Hi readers! I hope this finds you well. It was so much fun launching my first piece of writing two weeks ago. I received plenty of positive feedback from friends, which really helped persuade me to write more.
So, I came up with a fun new project. My hope is that it might solve a problem—and even if it isn’t a problem I personally face daily, it’s definitely a problem somewhere out there in the world! It makes you think: before starting any design project, should we always try to solve a specific problem? Or can design simply be a matter of expressing our idealism, regardless of whether it solves anything at all? That is a fascinating debate, but perhaps one best left for another post. Speaking of problem-solving, I honestly wanted to create an object that solves a real daily issue, or perhaps something brilliantly absurd like the “unnecessary inventions” by Matty Benedetto. For now, I will focus on my project. Hopefully, it solves a human problem—but if not, at least it’s functional! 😁
Here is the story: One afternoon, I was accompanying my kid to his inline skating training. It was just a normal day, watching the kids and their coach roll around. Then, my eyes caught an object I see on the ground all the time. It’s incredibly eye-catching, yet we usually look right past it.
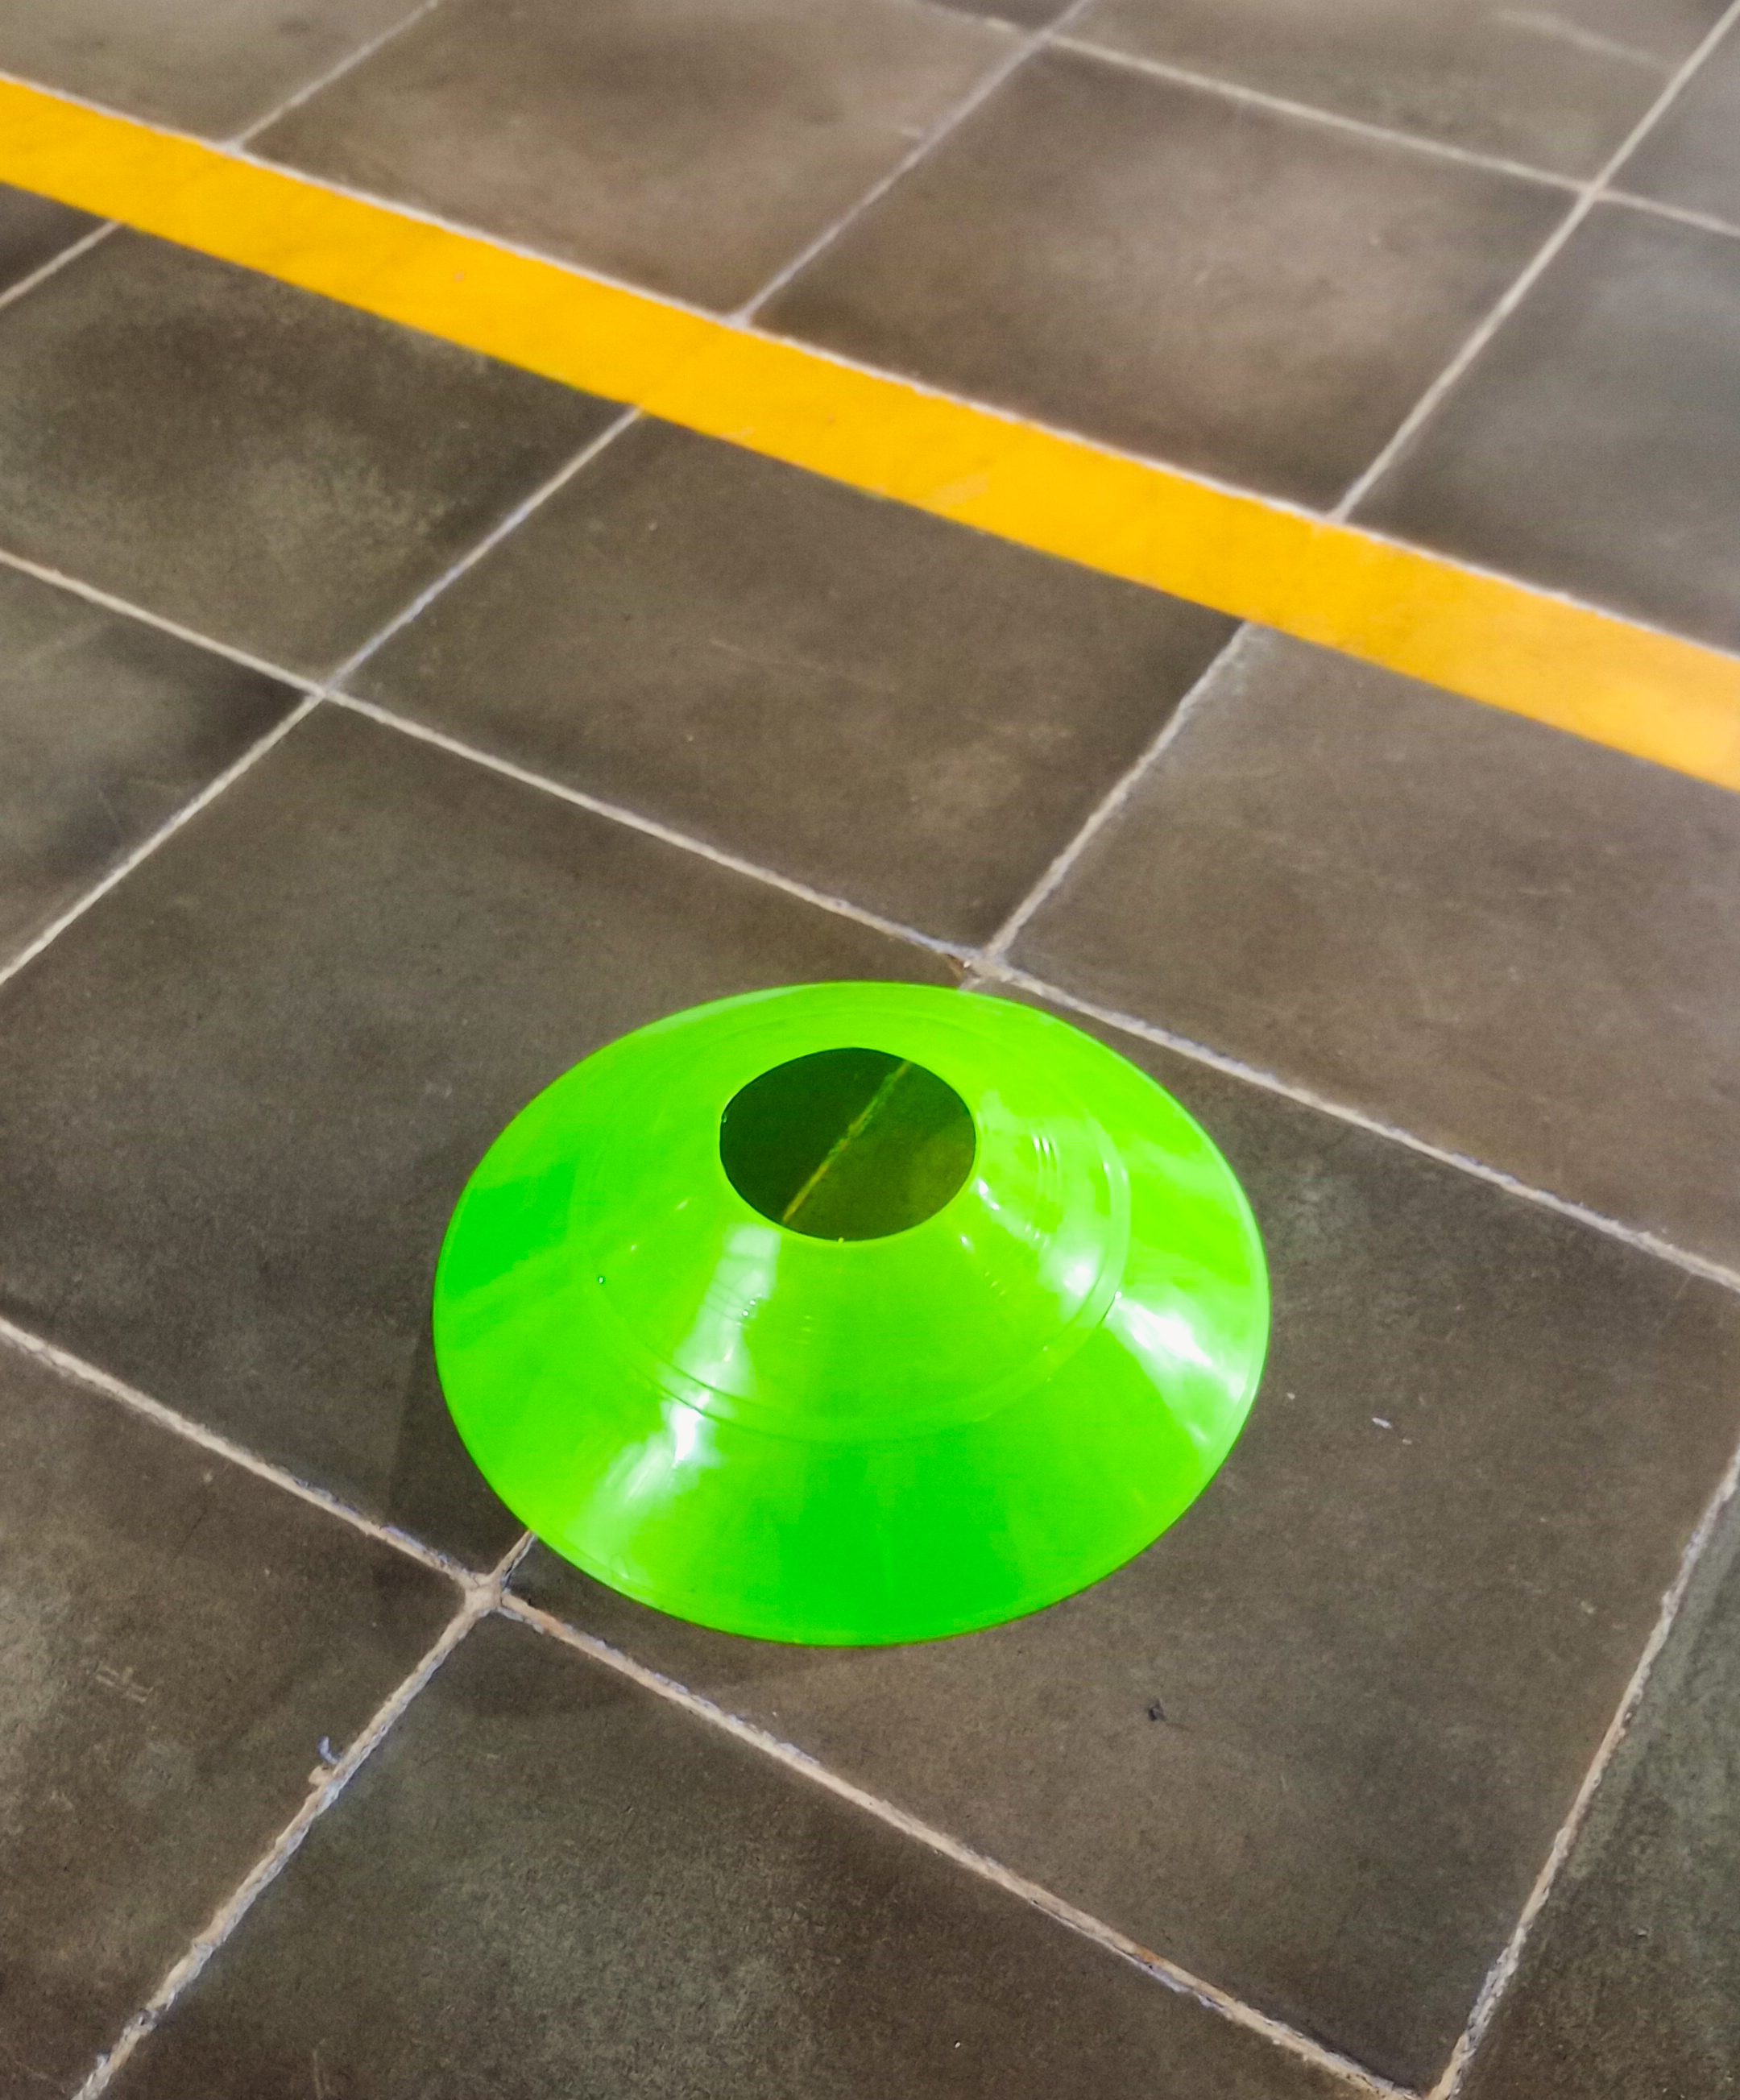
Yes, a cone! A whole row of saucer cones in bright, vibrant colors arranged across the floor. They are designed as low-profile markers, which is why they need to be highly visible, and they are perfectly nestable for efficient storage.
Aha… An idea flashed through my mind. Why not design a piece of furniture based on these exact principles? An object that can be arranged in a specific layout, is relatively bright and noticeable, and can be stacked. As a furniture designer, I had plenty of directions to go. Should I create a side table? Or A chair? Ultimately, I decided to design a lounge chair. I could instantly imagine a cluster of these pieces arranged beautifully in a resort garden, yet easily stacked and stored away when the space needs to be cleared or an event concludes. That would look incredibly cool, wouldn’t it?
Long story short, as soon as I arrived home, I grabbed my stylus and started drawing geometric shapes that evolved from the cone. It was pretty straightforward to see how this form could transition into a piece of furniture. But then, I hit the real work: the constraints. Every time I dig deeper into an idea, the challenges start piling up—and honestly, that is the most fun part. Once the basic silhouette of the lounge was in my head and I began sketching it into a more concrete existence, my brain started firing off questions: How big is this lounge? What material should it be? Is it going to be too heavy? And crucially: Is it going to be expensive? Since this is a self-funded personal project, I have to be very mindful of the budget. On top of that, I’ll need to find the right manufacturer to prototype it. But at this early ideation stage, a sketch is more than enough to capture the vision.
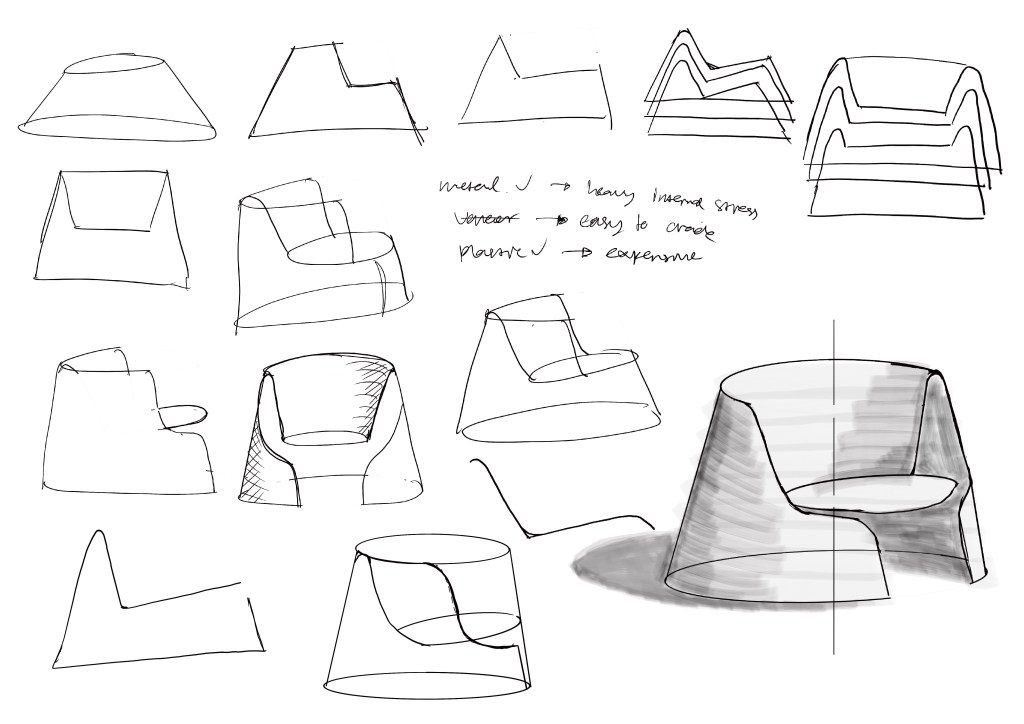
Let’s deep dive into the specific design challenges I uncovered during this phase:
1. Geometry and Proportion
First things first: the basic shape. The concept is modeled after a saucer cone—a shallow cone with the top cut off and an open section carved out. However, if you look at a standard training disc, the slope is incredibly wide and shallow. That exact profile doesn’t translate directly to furniture without some modification. For one, a person sitting in the lounge needs proper leg space, so we have to remove the front rim. Secondly, to make it comfortable to lean back against, I steepened the cone’s angle, making it more upright, and adjusted the overall proportions.
2. The Ergonomic Experience
Secondly, I wanted to focus heavily on the seating experience. I want the user to sit in a relaxed, reclined lounge position, which requires a deeper seat angle that naturally encourages leaning back. This means I need proper back support, so I have to ensure the backrest provides enough height.
3. Manufacturing and Material Selection
With the baseline criteria fulfilled, the next crucial step was figuring out how to actually manufacture this piece. This stage is vital because the fabrication process can change the look and shape dramatically. I weighed a few options:
- Metal: This material offers great flexibility for bending and creating sweeping curves. The downside? It’s heavy. Furthermore, forming sheet metal into a closed, continuous cone introduces massive internal tensile strength. Even a slight shift from heat during welding can warp the geometry into a total mess. To use metal, I would need to cut the profile and leave a non-continuous rim to allow the material to flex and release that internal tension.
- Bent Plywood / Veneer: Shaping veneer into a complex, 3D compound curve is a manufacturing nightmare. It requires advanced CNC machining and incredibly expensive custom molds—unless you split the top radius and join it with solid timber. The final result would be heavy, the grain direction would look disconnected, and it would require a heavy-duty seat frame underneath to withstand a person’s weight. I decided to skip this option for now.
- Plastic: Yes! This is the perfect material for the project. It is lightweight, inherently strong, and can be molded into virtually any shape we desire. The catch? The massive upfront investment required to create an injection mold. For a self-funded project, that comes down to development funding. That said, I would absolutely love to collaborate with a design brand interested in developing this as a commercial plastic lounge chair! 😏
Next Steps
Moving forward, I plan to tweak the concept slightly to better match the manufacturing resources and budget I have available. The next step is building the 3D digital model to analyze the technical and ergonomic requirements more deeply (or at least, to satisfy my own standards!). Lastly, I will generate a technical drawing package to clearly communicate the design to a manufacturer.
Granted, I still don’t know exactly who is going to build this prototype yet! But regardless of that matter, I’m going to finalize the 3D model, maybe 3D print a scale model, or run some ergonomic checks using alternative modeling materials.
I can’t wait to share the next phase of this journey with you all in my next post. Stay tuned over the next couple of weeks. See you then!
Kind regards,
Rafli
 raflievansyah.studio
Leave a comment